How to Install Radiant CMS on WebFaction
 WebFaction recently added a one-click installer for a Ruby/Rails/Nginx/Passenger stack. I tried it out last week, attempting to install the Rails-based CMS Radiant, but being fairly new to Rails I ran into a number of obstacles. Most of the problems I encountered involved mysterious version conflicts between dependencies and gems existing in multiple locations. It was incredibly frustrating but with some help from WebFaction’s excellent support department I eventually got things sorted out.
The Radiant wiki includes installation instructions for a number of hosts but not WebFaction. So I thought I’d write out the steps in detail for the benefit of any Rails beginners trying to get Radiant working on WebFaction.
Control Panel
1. In the WebFaction control panel go to Applications > Add New and select “Rails 2.3.5 (nginx 0.7.64/Passenger 2.2.8/Ruby Enterprise Edition 1.8.7)”. Name it “rails”, “radiant”, or anything else. To make sure there’s no confusion later in the tutorial I’m going to name it “rails”.
This creates a folder in your webapps directory containing installations of Nginx, Passenger, Ruby, Rails, and some key gems.
2. Go to the Domains section of the control panel and create a domain to associate with your app. For now you can just add a subdomain name to your webfactional.com domain, such as radiant.username.webfactional.com. Later you can point your app to a different domain.
3. Go to the Websites section of the control panel and create a new site. Select your subdomain, your Rails app, and in the URL path enter “/”.
4. Go to Databases > Create new database, select MySQL, and pick a name for your database. Make sure to write down the randomly generated password, as well as the database name. (For this example we’re using MySQL, but PostgreSQL should work too.)
SSH
Update (1/31/10): I’ve made a few changes in this section to reflect the more concise commands that WebFaction’s David Sissitka suggested in the comments.
5. That’s it for the control panel. SSH into your account and navigate to your Rails app folder: cd ~/webapps/rails. Then enter the following two commands which tell the shell that we want to use the gems and executables located in our rails project folder.
$ export GEM_HOME=$PWD/gems $ export PATH=$PWD/bin:$PATH |
6. Next we install the MySQL gem and the Radiant gem.
$ gem install --no-rdoc --no-ri mysql radiant |
7. Now we can create our Radiant project. At this point you should still be in the ~/webapps/rails folder. Enter this (note: because MySQL is the default database for the radiant command we don’t need to specify it.):
$ radiant radiant |
8. With our Radiant project created, next we need to configure Radiant to connect to our database. The file we need to edit is ~/webapps/rails/radiant/config/database.yml. We’re going to edit the file from the shell but you could also use SFTP and edit the file with a text editor.
Navigate to ~/webapps/rails/radiant/config and then open “database.yml” with your favorite editor. For example:
$ nano database.yml |
Scroll to the bottom where the production database info is stored. Enter your database name for the database and username (at WebFaction they are the same), and then enter the password. Save and exit (in nano, ^O, Enter, ^X).
9. Navigate to your Radiant project: cd ~/webapps/rails/radiant. Enter this:
$ rake production db:bootstrap |
You’ll see a message warning you that the database will be erased and asking if you want to continue. Say Yes. Then you’ll be prompted to create an admin name, username, and password. Make note of what you choose for the username and password.
Lastly you’ll be given the option of selecting a template to start your project with.
10. We’re almost done. Next we need to make a small edit to the nginx config file. We can do this directly from the shell:
$ cd ~/webapps/rails $ sed -i 's/hello_world/radiant/' nginx/conf/nginx.conf |
11. Let’s keep our project tidy and delete the hello_world app that the installer created.
rm -r hello_world |
12. Finally, we just need to reboot nginx:
./bin/restart |
If you get an error message about an address already in use, just repeat the restart command.
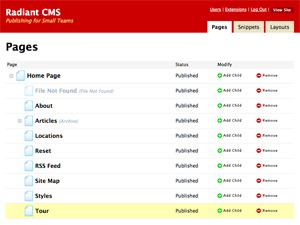
Navigate to the domain you chose for your app (radiant.username.webfactional.com, for example) and you should see the Radiant front-end.
That’s it! If you have trouble, or if you notice any errors, please email or leave a comment.
Both comments and pings are currently closed.
Discussion
Thank you for this! The procedure can be further simplified by using https://dpaste.com/152373/. Have you thought about creating a Radiant installer?
@ David
Thanks for that script. I think I like your version better. =)
Yes, writing a Radiant installer (or attempting to) is on my list. I’ll post it in the API forum when I have it finished.
Thanks for stopping by to comment.
Thanks for this. It was a fantastic help. I used the details to get a redmine install up and running.
Hopefully webfaction get their docs up to scratch on this one. The GEM_PATH with rake is a tricky one.
@Dane
I’m really glad to hear it was helpful. Yeah, with gems located in 3 different places on the server, getting the GEM_PATH correct is crucial. It seems simple once you figure it out, but before that I spent hours dissecting misleading rake errors about version conflicts.
Thanks for your comment.